
I've been creating and using "fabric gift bags" for quite awhile now.
They are a great way to showcase some of your favorite fabrics, or use up that stash!
A simple draw-string closure or two handles for a little girls bag...so many options when creating!
Gift wrapping is nice, but in all reality most people just throw it
away.
Hardly anyone reuses it, so these fabric bags make that happen.
They are great to re-use for just about anything. Extra toys to keep in
the car (especially for in the Grandparents car!), tuck in play
clothes, shoe keeper for the backpack or suitcase...or even to reuse as a gift bag!

Their age or an initial looks great for the kids birthday bags!

Or add some handles
and a birthday party treat bag
can be reused afterwards for a book tote!

I also made up a couple to hold the superhero masks that I made.

They can be simple with the drawstring across the top (no placket), but I like the looks of adding the extra bit of a coordinating fabric to encase the draw-string. And the string...oh strings! Here you can be basic with a simple piece of yarn, or string, or hemp...or even ribbons and beads. Go crazy!
I need to add a photo of a favorite of mine for wedding treat bags that I did- white organza bags, pink silk ties with beads and silver trinkets dangling. Oh so cute!
Recently my SIL asked me to make her a set of alphabet bags for her preschool class.
These were a lot of fun, and a great way to dig into some of my stash that I had forgotten about.

There are numerous tutorials online for many different types of drawstring bags/fabric gift bags.
I've been asked several times on how I do a basic drawstring, so I thought I would post a tutorial.
So here is how I do my basic drawstring bags.
At the end is a little help on creating variations (such as handles, lining, etc.)
Please feel free to use however you like EXCEPT please do not post this tutorial as your own or charge for it.
Happy Sewing!
-Ronna
Ronna's Drawstring Bag Tutorial
Step 1:
Cut out your pieces. All this is determined by of course, the size of bag you wish.
Just remember to cut the pieces + seam allowance.
Seam allowances:
Main Bag Sides (Width): 1/4" added when cut on fold. 1/2" added if not cut on fold.
Adjust accordingly to the size of seams you create.
I usually add 1/2" for the side seam so that I can do a french seam.
Main Bag Bottom/Top: 3/4" added. (1/4" for the bottom seam + 1/2" for the top) =3/4" added)
Again adjust accordingly to the size of the seams you create.
For these unlined bags, I do a basic seam along the bottom (zigzagging over the edges) as no one will really see the bottom of the inside. For the top I do a basic fold over 1/4" twice and top stitch. You can get creative here thou and create some very pretty hems, embroidery, added lace or ribbons. So just remember what you adding before you make your final cuts.
Placket: Cut on fold, the width of your bag. 1/2" added to the top/bottom.
Again adjust accordingly to the size you wish for your bag. I like the looks of 2" if the lettering/applique is large.
So for example: I want a bag to measure 8" wide & 10" tall.
I would then cut my main piece (on the fold) 8 1/4" wide & 10 3/4 tall.
My placket would be 8" wide and 2 1/2" tall.
Make sense?
Okay let's continue...
Piece A: The main bag. Cut on fold.
Piece B: The placket. This encases your drawstring.
Piece C: The letter/number/applique.
Piece D: The yarn or string for the drawstring.

Step 2:
Press down your top fold. (Fold down 1/4" press, fold again 1/4" press)
Prepare your placket by pressing under 1/4" on top and bottom. 1/2" on each end. I like to then add some fusible interfacing, it tacks down those edges and makes sewing easier. You can also top stitch the ends if you like.
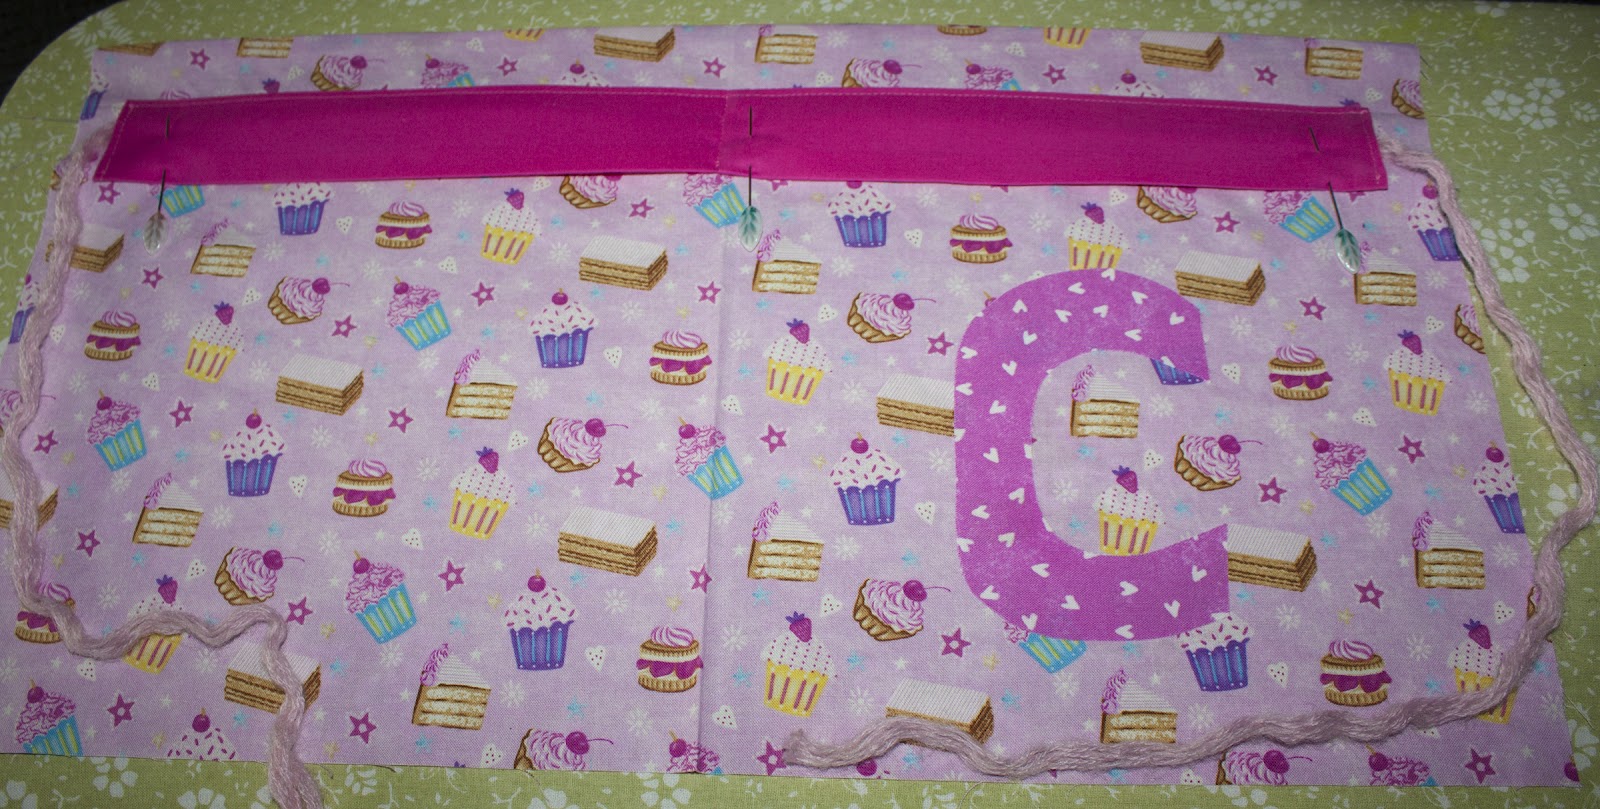
Pin the top of the placket to the front piece. I usually do about 2" down, giving just enough of a ruffle of the main fabric at the top when the bag is drawn & tied shut. Stitch the placket to the main bag piece along just the TOP of the placket.


Step 5: Sew the bottom seam. Turn inside out/right sides together. Sew along the bottom of the bag, being sure to back-stitch and sew at least twcie to "reinforce". You can also serge or zig-zag this seam. Trim edges. Turn back back right-side out.

Step 6: Turn right side out and press. Knot and trim the ends of your yarn.
(If you are worried about this, tie it first then trim according to the length you wish)

C is for...cupcakes!


And tied closed!
Awww. See, so many possiblities in making your own drawstring bags!
Thank you for using my tutorial! I hope that it was a help to you in creating your own drawstring bags.
I will post a followup to this tutorial tomorrow with various additions such as handles, lining etc.
No comments:
Post a Comment