Showing posts with label sewing. Show all posts

Monday, December 23, 2013

Bags...bags...

 Cross-body bag all finished!  I started making this one with just an idea in mind, no pattern.
I started out with the front/back of the bag, then made the sides (4 dc's wide) attaching the metal square-rings for the strap.  I then added a top flap to cover the zippered top (just rows of sc's edged with sc's) and made a lining out of blue minky fabric.  Adding the owl with a few stitches and it's done!  The last Christmas gift made!

Inside the flap, zippered lining


I've been making a lot of zippered makeup bags.  
This Seattle print fabric is one of my favorites!  It showcases highlights of the area so brightly!


Tuesday, December 17, 2013

Bits & Bobs into a girls bag!

Awhile back I found this pattern for a cute hooked Hearts Afghan and pulled out my red yarn, creating one of the squares.  I knew that I didn't want to create a full-sized blanket out of the pattern, so I tucked the square aside until the "right project" popped into my mind.  So yesterday I pulled out all my bits & bobs of yarn colors and tackled that "right project"! 
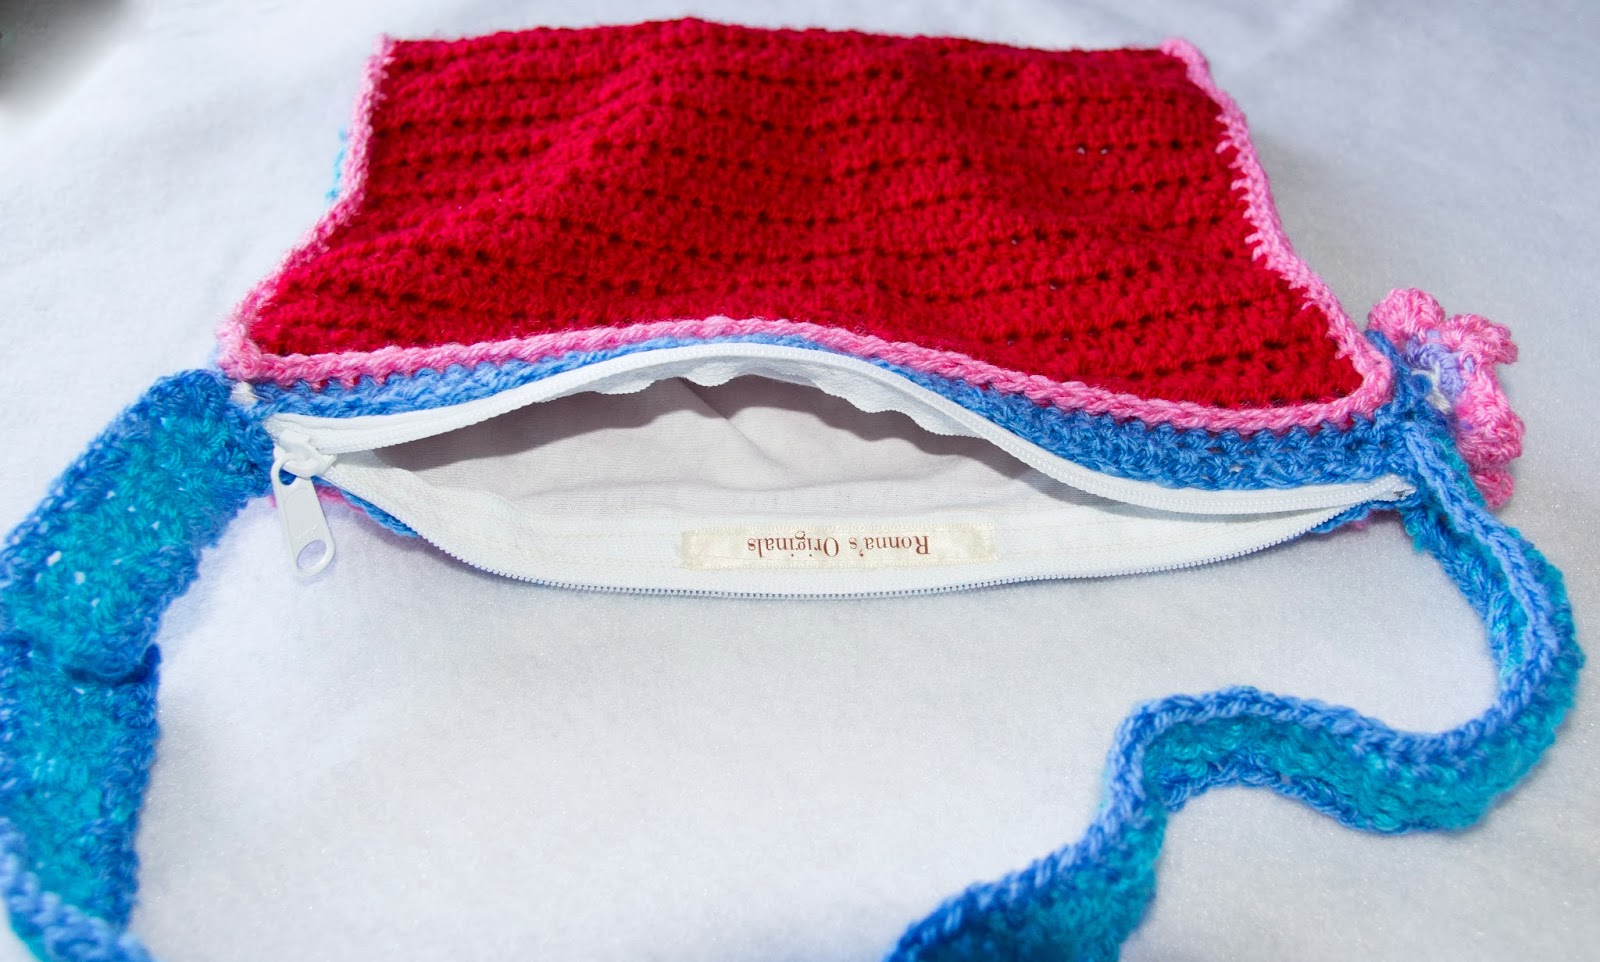
 I made a fully-lined with a zipper and everything bag for our youngest niece!


 The ubber cuteness almost got to me ;)  
but I love how cheery and bright it turned out!


My Girls Hooked Bag Tutorial O' Sorts:
I took my red heart square, sl st my red yarn into the bottom corner (red puffy heart/right side up!) hook 1 row sc, 4 rows dc, 1 row sc. (This is the base rows of the bottom of the bag).  Next continue on hooking the back of the bag with 30 rows of hdc's.  (When near the end I count to make sure the front and back are even!)


There you have it, a front/base/back of the bag.  
I started this in the evening thus the darker photos, but you can get the idea! 


Next I picked out a cornflower blue shade to create the bag strap. 
I created it 4 dc's wide and 24 inches long.


Now to attach the strap to the bag.  
I knew that I wanted the bubblegum pink as a trim 
so I used this as my yarn to piece it together.   
SLST into the bottom corner of the base, then sc around
 (4 sc's for the base bottom, adding an extra 2 sc's in each of the corners, and continuing up the side of the bag front.)  
Once you are at the top corner, 
continue with sc's across the top of the bag.


Continue down the other side, attaching the strap 
and making sure you don't have the handle twisted!  
I pinned it to the base bottom of the opposite side
 so I knew exactly where it would meet at the top right of the bag.
Keep attaching the handle to the bag with sc's around, 
up the other side of the handle and back of bag.  
SLST to beginning sc. 


 Next I created a zipper placket for the top of the bag.  
SLST your color onto the top corner, sc in same sp.  
Then hdc around in each stitch, with 4 hdc's in each end.  
It ends up looking like a long rectangle box.  
Now do any trims or designs to your bag that you would like.  Doing it now keeps all the ends inside the bag 
and not a hassle later after your lining is inside!  
I took white yarn and created cross-stitch pattern around the heart. 
And a row of slst border around the heart in lavender. I also took a sky blue and trimmed the handle with sc's.


This is what it looks like when finished:


Now you have a nice placket to attach your zipper to, 
making it all pretty and hidden! 


 Next take out your lining material.  
I used basic white cotton and a large white zipper.


 Make this as you would any bag or bag lining.  
(There are lots of tutorials out there if you need help! Some day I promise I will get to making a tut on a basic bags!)

 So just remember, you want the inside of this bag lining to be "pretty seams" and the outside is okay showing  seam ends as it will be inside the hooked bag.
 I squared off the bottoms of the lining, and added my label to the inside of the zipper lining.


Next slide your lining inside of the hooked bag and pin in place.  Hand sew it to the top of the blue rows of hdc's all the way around, giving it some extra attention at each end.  Make sure you keep your hdc's below the zipper line so it won't get stuck inside the zipper when using!


 Next add on any trims you would like.  
I made a basic flower and added a hooked heart to it's center.


 And all done!  I love how cutsie and girly it turned out!


Friday, December 13, 2013

Eye Masks!

I love all the spa and bath gift sets that come out at Christmas time...
but if you are like me, some of them just do not have "just enough" in them for a great gift.
I like to add a few little things to mine to give them a little extra handmade touch.
Sometimes a few scrubby hooked washcloths or bathmitts, or a pair of hooked slippers.
This year I decided to use some of my hooked bits of Irish Crochet and create some eye masks.
Easier to make than I first thought too!
Awhile back I made some superhero eye masks and I kept thinking to use the same method and create some spa-style masks for the ladies in my life.  Finally I did!
I love how they turned out!  And mmm...I filled them with lavender grown, harvested, and dried by myself!  A full circle gift :)


Eye masks are really simple! (There are a ton of tut's out there for those who need photos to follow-along or a more in-depth tut!) I do have some red silk and black hooked lace that I'll be creating next so I'll be sure to do photos for some help!

Here is what I did:
Draw your template on a piece of paper or cardboard.  Cut out your front/back and batting pieces from it.  I take my batting then and sew around the 3 sides, leaving one open to insert the lavender, then sew up the forth side.  On the front piece of fabric, I pinned my hooked lace and then basted it on, making sure that the front side of the fabric was facing upwards. Next I cut a piece of fabric for my elastic "sleeve", making sure it was long enough for a head-size, and basted it to the front piece on each side.  Next I laid the back piece on top of the front piece, right sides together, pin it and sew around the sides and bottom while being careful for the elastic inside. Leave the top open about 4 inches for turning.  Turn it right side out, press the back (being careful with the lace), push the corners out, and then slide the batting inside.  Sew up the top opening and done!  Easy and yet a beautiful gift! 

Thursday, July 25, 2013

Hooked Bodice Top


 I love how so many summer tops are having hooked pieces to them!
So when I stumbled upon a Japanese crochet pattern for this hooked bodice top with a fabric skirt attached, I knew that I had to make it!


 It starts very easy, you create the squares that form the ring around the mid-riff area, attaching each one to each other as you go.

I used size 10 crochet thread in off white/ecru and a size B hook.  This was hard for me, as I typically use a size 6 or 7 hook with the crochet thread.  The pattern called for a size B to create the right gauge, so I kept with that for this first attempt.  Perhaps now that I finished one, I will try one using the smaller hook and adjust the pattern to fit the smaller pieces. 


 Next you add a row of mesh to the top of the ring formed by the attached squares.
From here you continue upwards to create the top of the bodice.


Ending with basic dc straps and a sc edging.
The bottom is a basic mesh row, then dc rows, with an added basic edging.
Topped off with a crochet tie/bow and some hidden snaps.


 I attached a skirt of pink rosebud print and here it is!
I love how it turned out!


Now to send it off to our oldest niece and *fingers crossed* it fits her and that she likes it! 


Tuesday, July 16, 2013

Another patchwork skirt!


Another patchwork skirt done!  
Our niece Allie went thru my fabric drawers last month 
and after "ohhhhing and ahhhhing" on several fabrics, 
she informed me that she wanted a "twirlly one with owls...
and birds...and girls...and...and...and...and".  
I think that I covered all the "ands" and then some!


These are so much fun to make and a great way to use up the 
bits & pieces held onto for something special! 
I love adding all the little trinkets that I've held on to also...
the special buttons, the hooked flowers & trims that I have made,
and the patches that I made out of favorite fabrics.  

Super easy to do.  Measure the waist and cut your fabric like you would for any draw-string waist band skirt.  There are SO many youtube videos to help you thru this if you haven't made them before and need some help to follow along.  I just make 2 buttonholes on my machine for the drawstring waistband (cutting a piece of elastic 1/3 the dimension of the waist measurement and sewing on two ties to the ends, weaving out the buttonholes).
Each row after the 'base waistband row' I add a bit more material and gather...before you know it, you are done! 


Thursday, March 7, 2013

Repurposed Wool Scarf

Today's project...re-purposing a wool scarf 
that I picked up at our local Antique Store. 


It was obvious that it had been washed before, 
but I loved how soft it was and the colors really caught my eye.
It seemed perfect to create into a small cross-body bag.  


The Celtic knot button fell off of a bookmark that my MIL Debbie 
gave me years ago that I have held onto...
and now found the perfect spot for it! 
Lined with a recycled tshirt of my hubby's.  
A great recycle project!
I turned it into a bag in 1 1/2 hours! 


I cut it out by laying both ends of the scarf right-side together, the tassel edges lined up.  Cut the length I wished for the bag.  
Then I cut a small piece to create the front pocket out of.  
The remaining I laid flat, folded in two, cut in half, and cut those in half again.  I trimmed these pieces into 2" wide and used 3 of them to sew together (creating a long strip) for the strap.  Folded & pressed both sided in, then sewed along both sides.  Strap done!  
I laid the pocket piece on top of a piece of tshirt, cutting out them both out on the mat so they are the same sizes. I used the last piece of strips (from the strap pieces) and trimmed the top of the pocket piece with it. Then I lined with interfacing and attached to the front of the bag.   
Next lay out the back of the bag piece on top of 2 pieces of t-shirt material, and cut out the lining.  Interfaced those. 
Attach the zipper to each side as you would any bag.  Remembering to slide in your strap ends on each side.
Next I folded the bag so the right sides were together, tucking the strap out of the way along with the lining.  I wanted the tassel ends to be part of the bag, so I stitched the bottom of the bag with right sides out, instead of the usual way.  Next I pulled the bag back so it was right sides together and readied to sew along the edges all around, but carefully tucked the edges at the bottom of the bag where the tassels are inside a bit more.  Make sense?  
It was a little tricky, but I liked how it turned out!  Sew the rest just like any bag, leaving your opening the in lining for turning.   Turn it right side out and, press, and sew that opening closed.  
Then I glued a metal Celtic button that I had from a bookmark onto the front of the pocket.  I considered making it a real button, with buttonhole, but this wasn't  a typical button so I just glued it on.
There, a cute bag all finished!  

Thursday, February 21, 2013

dia de los muertos bag

I found a little piece of dia de los muertos fabric in my stash 
and decided to make myself a little bag.  
Adding some flair with sequins, beads, and embroidery stitches!

So many projects tucked in my basket of fun...
hopefully this one  will stay towards the top ;)


Wednesday, November 14, 2012

Christmas Skirts

I found this fabric last year at a cute quilt shop.  
I love these shops! The ones that actually take the time to keep the hues flowing throughout the store, while tucking the pretty eye-catching sets in cabinet displays.
  
 (Moda fabrics)
They remind me of Norwegian Holiday sets, and Christmas at my Grandma's.  I thought about making another set of the dresses.  They are perfect for the contrasting of pretty fabrics, but not so much for this time of year.  At least not here in the Northwest!

 
So bringing in the brightness of the fabrics, I thought about little Cindy Lou Who on The Grinch Movie...and twirly skirts took form!    


Now just to make a red tutu petticoat layer underneath for the perfect full twirl!


 I added a little red heart to one side of the skirt hem, 
and made a puffy red heart pin for the pocket!  
A few little trinkets for added cuteness! 


I'll do up a tutorial with what I did as I create the next one & post here!  


Happy Skirt-Twirlling Nieces!


Friday, October 5, 2012

Skirts Requested

 This past weekend was spent with a visit to see two of my nieces. 

I needed new measurements for both of them, 
so I had to smile when the oldest pulled out a paper with         
a drawing of angels & hearts for me to use.  
These little drawings always make me smile later on in the week when I go back to check on their measurements that I had written down.  I really need to make a quilted wall hanging out of all these little drawings and measurements!

The request this time was "SKIRTS!".  
I'm sorry, but to be exact it was "SKIRTS, not like one but like more than two!"  
Thankfully I had been sorting through my fabric stash and found quite a few yards that would work.  
Four down...a few more to go! 


 Their requests were "PUPCAKES!"  
"Yeah, cupcakes...wait no, OWLS!"
I was lucky enough to find both on one print.  

 I like to use my RO's tags to mark the back of the skirts for them.  It's also handy to leave a little opening into the elastic waistband area, so you can adjust the size of the elastic as they grow! 


A little applique and it's a cute outfit! 


You don't really need a pattern to create these type of skirts.  
There are so many tutorials, youtube video's, or DIY links online to help you out. 

What do I do? 
Here are the basics:
1. Measure their waist & from waist to knee. 
2. Cut out your pieces, making sure you add for your seam allowances, hems etc. I cut-out on the fold of the fabric, using the full width of the fabric.  So far for my nieces sizes, this fits perfect.  (this also gives you only one side seam to sew up).  The waistband piece I cut out 2- 3" wider than their waist, width depends on your taste for the skirt!
3. Sew the hem first. I usually double this piece/fold in half so that it shows the "right side" on the underside of the skirt a bit.  Very cute for the girls who like to twirl!
4. Do a french seam up the side seam.
5. Sew the waistband into a circle, leaving a small opening for the size of your elastic.   Gather the top of the skirt and pin along one edge of the waistband (checking to make sure that the hole for the elastic insertion is on the correct side).
6. Sew skirt to waistband.  Trim, press the seams, all that stuff.  Fold under the top of the waistband, fold in half and press again.  Sew up your waistband.  
7. Insert your elastic into the hole you left.  
8. There you made a skirt!


Wednesday, September 19, 2012

Drawstring Bags & Tutorial

I've been creating and using "fabric gift bags" for quite awhile now.  
They are a great way to showcase some of your favorite fabrics, or use up that stash!  
A simple draw-string closure or two handles for a little girls bag...so many options when creating!  

Gift wrapping is nice, but in all reality most people just throw it away. 
Hardly anyone reuses it, so these fabric bags make that happen.  They are great to re-use for just about anything.  Extra toys to keep in the car (especially for in the Grandparents car!), tuck in play clothes, shoe keeper for the backpack or suitcase...or even to reuse as a gift bag! 


Their age or an initial looks great for the kids birthday bags!

Or add some handles 
and a birthday party treat bag 
can be reused afterwards for a book tote!


I also made up a couple to hold the superhero masks that I made.


They can be simple with the drawstring across the top (no placket), but I like the looks of adding the extra bit of a coordinating fabric to encase the draw-string.  And the string...oh strings! Here you can be basic with a simple piece of yarn, or string, or hemp...or even ribbons and beads.  Go crazy! 
I need to add a photo of a favorite of mine for wedding treat bags that I did- white organza bags, pink silk ties with beads and silver trinkets dangling.  Oh so cute!

Recently my SIL asked me to make her a set of alphabet bags for her preschool class. 
These were a lot of fun, and a great way to dig into some of my stash that I had forgotten about.


There are numerous tutorials online for many different types of drawstring bags/fabric gift bags.
I've been asked several times on how I do a basic drawstring, so I thought I would post a tutorial.
So here is how I do my basic drawstring bags. 
At the end is a little help on creating variations (such as handles, lining, etc.) 
Please feel free to use however you like EXCEPT please do not post this tutorial as your own or charge for it.

Happy Sewing!
-Ronna


Ronna's Drawstring Bag Tutorial

Step 1:
Cut out your pieces.  All this is determined by of course, the size of bag you wish. 
Just remember to cut the pieces + seam allowance. 

Seam allowances:
Main Bag Sides (Width): 1/4" added when cut on fold. 1/2" added if not cut on fold. 
Adjust accordingly to the size of seams you create. 
I usually add 1/2" for the side seam so that I can do a french seam.
Main Bag Bottom/Top: 3/4" added.  (1/4" for the bottom seam + 1/2" for the top) =3/4" added)
Again adjust accordingly to the size of the seams you create.
For these unlined bags, I do a basic seam along the bottom (zigzagging over the edges) as no one will really see the bottom of the inside. For the top I do a basic fold over 1/4" twice and top stitch.  You can get creative here thou and create some very pretty hems, embroidery, added lace or ribbons. So just remember what you adding before you make your final cuts. 
Placket: Cut on fold, the width of your bag. 1/2" added to the top/bottom.
Again adjust accordingly to the size you wish for your bag.  I like the looks of  2" if the lettering/applique is large.


So for example: I want a bag to measure 8" wide & 10" tall. 
I would then cut my main piece (on the fold) 8 1/4" wide & 10 3/4 tall.
My placket would be 8" wide and 2 1/2" tall.
Make sense?
Okay let's continue...


Piece A: The main bag. Cut on fold.  
Piece B: The placket. This encases your drawstring.
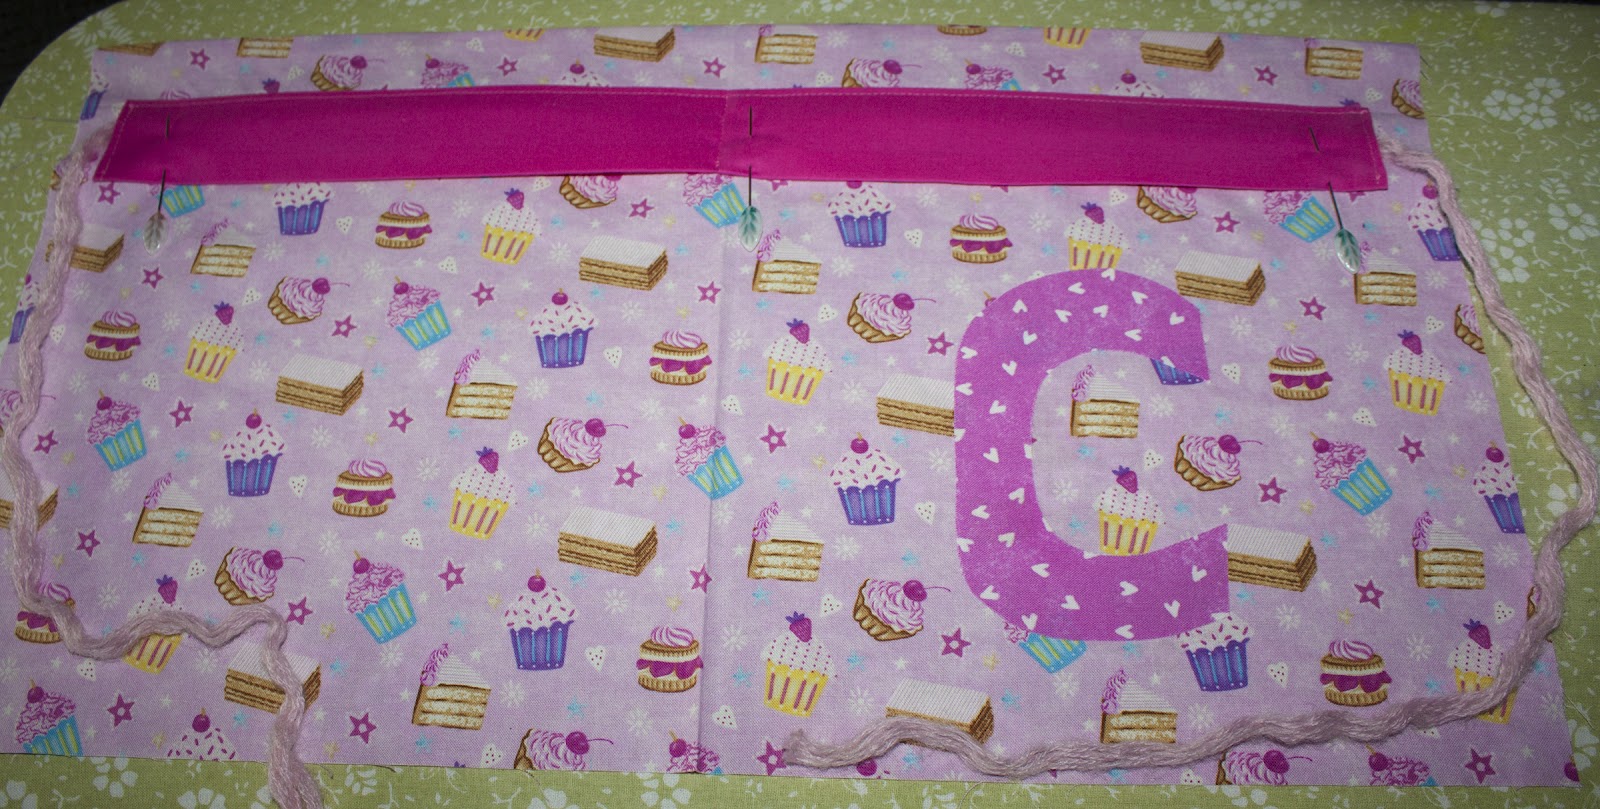
Piece C: The letter/number/applique. 
Piece D: The yarn or string for the drawstring.


Step 2:
Press down your top fold.  (Fold down 1/4" press, fold again 1/4" press)
Prepare your placket by pressing under 1/4" on top and bottom. 1/2" on each end.  I like to then add some fusible interfacing, it tacks down those edges and makes sewing easier.  You can also top stitch the ends if you like.
Pin the top of the placket to the front piece. I usually do about 2" down, giving just enough of a ruffle of the main fabric at the top when the bag is drawn & tied shut.  Stitch the placket to the main bag piece along just the TOP of the placket.
 Next take the center of your string/yarn. Hold up the placket at the center, tucking the center of your yarn underneath.

  Fold the placket back down over the yarn and stitch.  This holds your yarn in place and the drawstring won't be able to be "yanked" out of the bag!

 Next pin down the bottom of the placket, being sure to tuck the yarn out of the way!  Stitch in place.

 Step 3: Add the applique to the front.  Follow the directions of the fusible webbing you use.

 Step 4: Sew the side of the main bag together. I like to do a french seam here. This makes the side seam pretty with no loose edges/serged seams showing.  To do this: Turn bag so that the right sides are out/wrong sides together. Sew a 1/4" seam. Trim close.  Turn inside out/right sides together. Sew a 1/4" seam, enclosing the previously sewn seam.


 Step 5: Sew the bottom seam.  Turn inside out/right sides together. Sew along the bottom of the bag, being sure to back-stitch and sew at least twcie to "reinforce".  You can also serge or zig-zag this seam. Trim edges. Turn back back right-side out.


 Step 6:  Turn right side out and press. Knot and trim the ends of your yarn.
(If you are worried about this, tie it first then trim according to the length you wish)

 C is for...cupcakes!


 And tied closed!  
Awww. See, so many possiblities in making your own drawstring bags!

Thank you for using my tutorial! I hope that it was a help to you in creating your own drawstring bags.  


I will post a followup to this tutorial tomorrow with various additions such as handles, lining etc.