Showing posts with label tutorial. Show all posts

Tuesday, December 17, 2013

Bits & Bobs into a girls bag!

Awhile back I found this pattern for a cute hooked Hearts Afghan and pulled out my red yarn, creating one of the squares.  I knew that I didn't want to create a full-sized blanket out of the pattern, so I tucked the square aside until the "right project" popped into my mind.  So yesterday I pulled out all my bits & bobs of yarn colors and tackled that "right project"! 
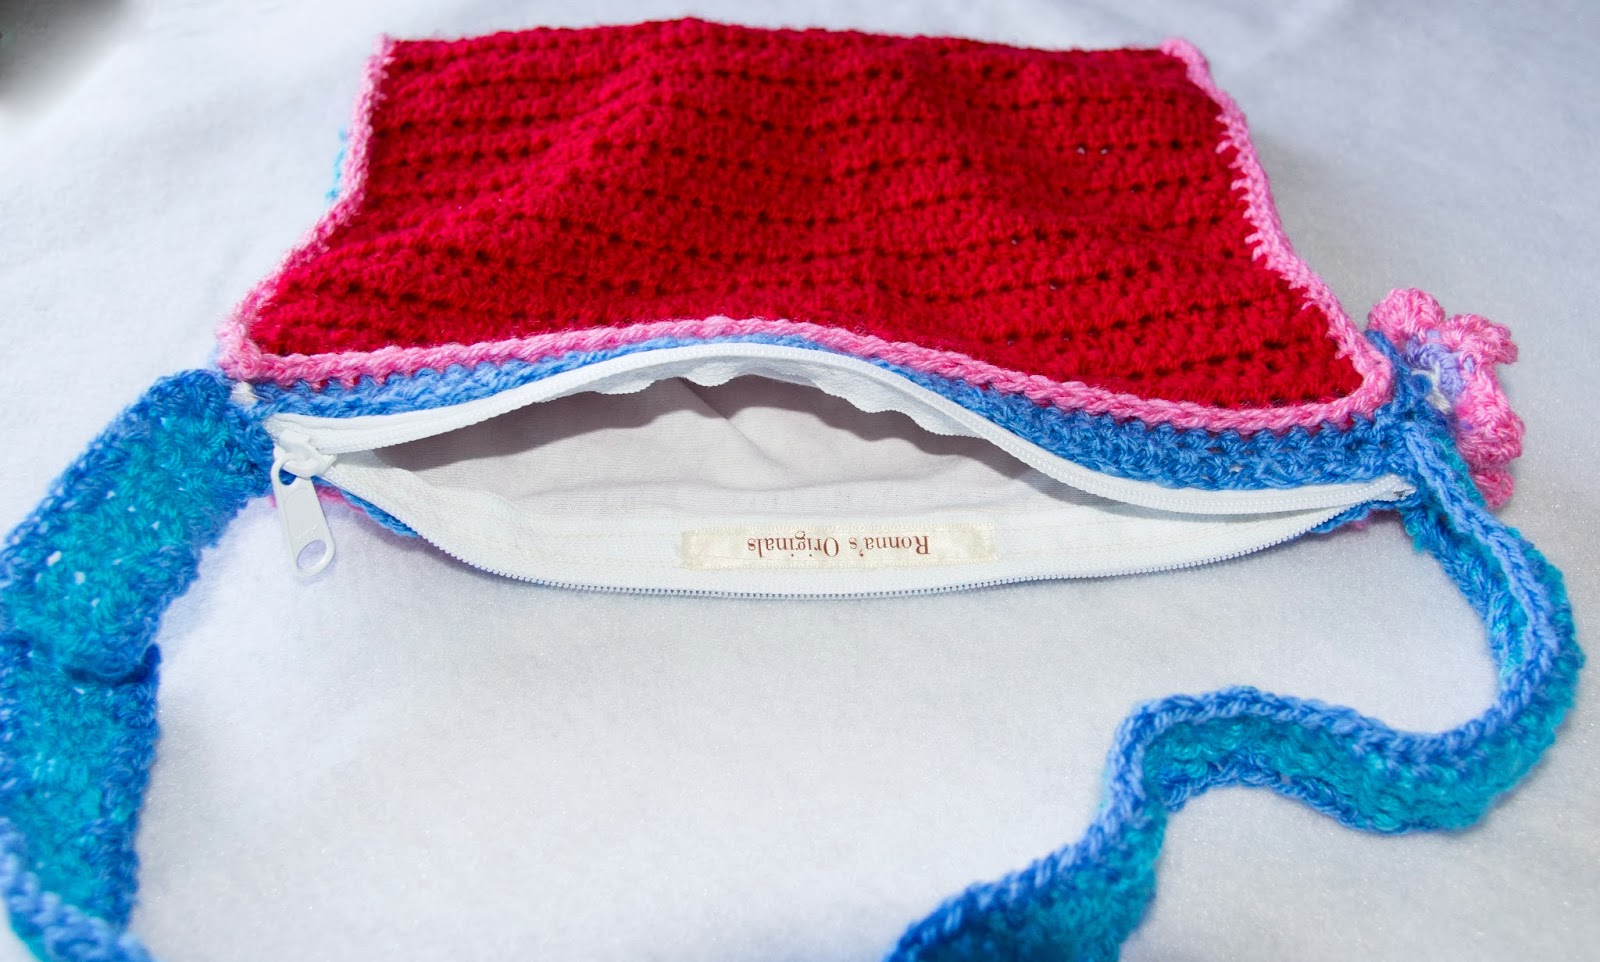
 I made a fully-lined with a zipper and everything bag for our youngest niece!


 The ubber cuteness almost got to me ;)  
but I love how cheery and bright it turned out!


My Girls Hooked Bag Tutorial O' Sorts:
I took my red heart square, sl st my red yarn into the bottom corner (red puffy heart/right side up!) hook 1 row sc, 4 rows dc, 1 row sc. (This is the base rows of the bottom of the bag).  Next continue on hooking the back of the bag with 30 rows of hdc's.  (When near the end I count to make sure the front and back are even!)


There you have it, a front/base/back of the bag.  
I started this in the evening thus the darker photos, but you can get the idea! 


Next I picked out a cornflower blue shade to create the bag strap. 
I created it 4 dc's wide and 24 inches long.


Now to attach the strap to the bag.  
I knew that I wanted the bubblegum pink as a trim 
so I used this as my yarn to piece it together.   
SLST into the bottom corner of the base, then sc around
 (4 sc's for the base bottom, adding an extra 2 sc's in each of the corners, and continuing up the side of the bag front.)  
Once you are at the top corner, 
continue with sc's across the top of the bag.


Continue down the other side, attaching the strap 
and making sure you don't have the handle twisted!  
I pinned it to the base bottom of the opposite side
 so I knew exactly where it would meet at the top right of the bag.
Keep attaching the handle to the bag with sc's around, 
up the other side of the handle and back of bag.  
SLST to beginning sc. 


 Next I created a zipper placket for the top of the bag.  
SLST your color onto the top corner, sc in same sp.  
Then hdc around in each stitch, with 4 hdc's in each end.  
It ends up looking like a long rectangle box.  
Now do any trims or designs to your bag that you would like.  Doing it now keeps all the ends inside the bag 
and not a hassle later after your lining is inside!  
I took white yarn and created cross-stitch pattern around the heart. 
And a row of slst border around the heart in lavender. I also took a sky blue and trimmed the handle with sc's.


This is what it looks like when finished:


Now you have a nice placket to attach your zipper to, 
making it all pretty and hidden! 


 Next take out your lining material.  
I used basic white cotton and a large white zipper.


 Make this as you would any bag or bag lining.  
(There are lots of tutorials out there if you need help! Some day I promise I will get to making a tut on a basic bags!)

 So just remember, you want the inside of this bag lining to be "pretty seams" and the outside is okay showing  seam ends as it will be inside the hooked bag.
 I squared off the bottoms of the lining, and added my label to the inside of the zipper lining.


Next slide your lining inside of the hooked bag and pin in place.  Hand sew it to the top of the blue rows of hdc's all the way around, giving it some extra attention at each end.  Make sure you keep your hdc's below the zipper line so it won't get stuck inside the zipper when using!


 Next add on any trims you would like.  
I made a basic flower and added a hooked heart to it's center.


 And all done!  I love how cutsie and girly it turned out!


Friday, December 13, 2013

Eye Masks!

I love all the spa and bath gift sets that come out at Christmas time...
but if you are like me, some of them just do not have "just enough" in them for a great gift.
I like to add a few little things to mine to give them a little extra handmade touch.
Sometimes a few scrubby hooked washcloths or bathmitts, or a pair of hooked slippers.
This year I decided to use some of my hooked bits of Irish Crochet and create some eye masks.
Easier to make than I first thought too!
Awhile back I made some superhero eye masks and I kept thinking to use the same method and create some spa-style masks for the ladies in my life.  Finally I did!
I love how they turned out!  And mmm...I filled them with lavender grown, harvested, and dried by myself!  A full circle gift :)


Eye masks are really simple! (There are a ton of tut's out there for those who need photos to follow-along or a more in-depth tut!) I do have some red silk and black hooked lace that I'll be creating next so I'll be sure to do photos for some help!

Here is what I did:
Draw your template on a piece of paper or cardboard.  Cut out your front/back and batting pieces from it.  I take my batting then and sew around the 3 sides, leaving one open to insert the lavender, then sew up the forth side.  On the front piece of fabric, I pinned my hooked lace and then basted it on, making sure that the front side of the fabric was facing upwards. Next I cut a piece of fabric for my elastic "sleeve", making sure it was long enough for a head-size, and basted it to the front piece on each side.  Next I laid the back piece on top of the front piece, right sides together, pin it and sew around the sides and bottom while being careful for the elastic inside. Leave the top open about 4 inches for turning.  Turn it right side out, press the back (being careful with the lace), push the corners out, and then slide the batting inside.  Sew up the top opening and done!  Easy and yet a beautiful gift! 

Wednesday, March 20, 2013

My Hooked & Woven Baby Blanket Pattern

I have been seeing some amazing woven crocheted/hooked blankets out there, and they really are a "new take" on hooking for me.  They really do resemble the Scottish Plaid Afghans.
So I decided (after following one pattern and having to expand the size of it for my liking) to create my own pattern in the size and striped pattern that I wanted.  
The yarn I love using is Deramores Stylecraft. I picked the colors Aster, Aqua, Lipstick, and Saffron for this blanket.  They really stand out together and are awesomely bright for a baby boy blanket in which I was creating! 

  Front of Blanket
 Back of Blanket

For those of you who need more instruction than my basic steps,
please search "how to crochet" online via basic search or thru youtube.com!

My Hooked & Woven Baby Blanket Pattern:
Step 1:
Using Hook US G6/4.00MM ch 143
Row1: dc in fifth ch from hook (this is your first dc and ch1) *ch 1, skip 1 ch, dc in next ch.  Repeat from * across to end with dc. Ch 4 (counts as dc & ch1) and turn for next row.

Row2: *dc in dc, ch 1. Repeat across, ending with dc. Ch 4 and turn.  
Repeat this pattern creating your "mesh" background using Row 2 until you have a total of    67 rows.  
This gives you a "mesh" background of 70 "squares" wide & 67 "squares" tall.
(Mine is approx. 28" square.) 
Be sure to weave in the ends of your yarn at each start of a new color, as this saves you time later! Unless you plan on adding an edging to your blanket that will work them all in. 
  
Color Pattern for "mesh" background:  8 rows Aqua, *2 rows Saffron, 1 row Lipstick, 1 row Aster, 1 row Lipstick, 2 rows saffron, 4 rows aqua, 2 rows Saffron, 1 row Aster, 1 row Lipstick, 1 row Aster, 2 rows Saffron, 4 rows Aqua, repeat from * ending with 8 rows Aqua

Step 2:
Using Hook US H8/5.00MM Start your rows of weaving.  To do this you are simply doing a row up sl st's up the mesh background.   (color pattern at end of photos)
The first patterns that I found do this process, using vintage crochet sites, were just printed out words and I was at a loss!  So here are some photos to help you along!

You make your slip knot & insert hook into first "square" of the mesh.
Draw up a loop, and keep working into the next "square".
SL ST each time and working your way upwards from the bottom first row of the blanket.


Be sure to hold your yarn behind your blanket, or you will have a tangled mess!  
This is what takes some getting used to, but once you get the hang of it, it's a very fast process! Also keep it loose, you will want this to be worked loosely, or you will end up with a tiny tight blanket.   (I loose about 4" in the height during the "weaving" step, so keep it loose!)

The stripes pattern for Step 2: Starting from the far bottom left corner of the blanket, work from left to right.
*4  rows Aqua, 2 rows Saffron, 1 row Aster, 1 row Lipstick, 1 row Aster, 2 rows Saffron, 4 rows Aqua, 2 rows Saffron, 1 row Lipstick, 1 row Aster, 1 row Lipstick, 2 rows Saffron, 
*Repeat to edge at right-side ending with 4 rows Aqua. 


For those of you who notice the pattern/or are overly OCD about things...you can adjust this so the pattern is centered. I.E.  the red/aster stripes start and finish with offsets.

Next go thru and knot each start/end of the stripes rows.  You can weave them in & trim, or leave them hanging as I did.  I did, as I mentioned, gave each one a good double-knot and then trimmed them all neatly the same length.  This gives it a nice fringe, just like the Scottish Plaid blankets that this is patterned after. Or you can add your own edging pattern, simple or extreme...up to you!

Finished!
Approx. 28" wide & 24" tall
 
I hope that this is easy for you to understand and helps you create a quick & very pretty patterned woven blanket!  Please feel free to share your creations, sell your creations, etc.using my pattern.
Just please do not sell my pattern. Please link back to here for my pattern.


Friday, December 7, 2012

Little Christmas Slippies

I needed a quick little yarn gift, 
so I adapted a slipper pattern I had made myself 
and came up with some tiny little slippers.  
Perfect!  


This is for a pair of slippers that are 
4" long & approx. 2 1/4" at widest part of foot
using a size G hook.


Just like in socks/slippers, start a base row to fit your toe line.
You can adjust the amount of chains for your size needed.


Base Row (for toe line): Ch 3
(work in-round from now on)
1.) 2 sc's in 3rd ch of base row, 2 sc's in next ch, 5 sc's into 1st ch, 2 sc's in next, 3 sc's in next, sl st together.
2.) *sc in next 6 sc's, 3 sc's in next, * repeat again, sl st together.
Change color if desired & create the pattern you wish for the foot section in the next 8 rows.
3.) - 11.) sc around (18 sc total)
Change color if desired. (I changed to red)
To form heel area:
12.) - 18.) sc in next 9 sc's. Turn after each row. Sl St heel end together.
Change color. (I changed to pink)
19.) Hook into top of heel area and sc around. sl st together. Tie off & weave in end. 

You can continue on with a nice trim row, 
or make a pompom for the heel area, or continue on for a sock!   
The socks are perfect to tie one onto 
 the top of your gifts with a candy cane! 
 Or hung on the tree!


Wednesday, September 19, 2012

Drawstring Bags & Tutorial

I've been creating and using "fabric gift bags" for quite awhile now.  
They are a great way to showcase some of your favorite fabrics, or use up that stash!  
A simple draw-string closure or two handles for a little girls bag...so many options when creating!  

Gift wrapping is nice, but in all reality most people just throw it away. 
Hardly anyone reuses it, so these fabric bags make that happen.  They are great to re-use for just about anything.  Extra toys to keep in the car (especially for in the Grandparents car!), tuck in play clothes, shoe keeper for the backpack or suitcase...or even to reuse as a gift bag! 


Their age or an initial looks great for the kids birthday bags!

Or add some handles 
and a birthday party treat bag 
can be reused afterwards for a book tote!


I also made up a couple to hold the superhero masks that I made.


They can be simple with the drawstring across the top (no placket), but I like the looks of adding the extra bit of a coordinating fabric to encase the draw-string.  And the string...oh strings! Here you can be basic with a simple piece of yarn, or string, or hemp...or even ribbons and beads.  Go crazy! 
I need to add a photo of a favorite of mine for wedding treat bags that I did- white organza bags, pink silk ties with beads and silver trinkets dangling.  Oh so cute!

Recently my SIL asked me to make her a set of alphabet bags for her preschool class. 
These were a lot of fun, and a great way to dig into some of my stash that I had forgotten about.


There are numerous tutorials online for many different types of drawstring bags/fabric gift bags.
I've been asked several times on how I do a basic drawstring, so I thought I would post a tutorial.
So here is how I do my basic drawstring bags. 
At the end is a little help on creating variations (such as handles, lining, etc.) 
Please feel free to use however you like EXCEPT please do not post this tutorial as your own or charge for it.

Happy Sewing!
-Ronna


Ronna's Drawstring Bag Tutorial

Step 1:
Cut out your pieces.  All this is determined by of course, the size of bag you wish. 
Just remember to cut the pieces + seam allowance. 

Seam allowances:
Main Bag Sides (Width): 1/4" added when cut on fold. 1/2" added if not cut on fold. 
Adjust accordingly to the size of seams you create. 
I usually add 1/2" for the side seam so that I can do a french seam.
Main Bag Bottom/Top: 3/4" added.  (1/4" for the bottom seam + 1/2" for the top) =3/4" added)
Again adjust accordingly to the size of the seams you create.
For these unlined bags, I do a basic seam along the bottom (zigzagging over the edges) as no one will really see the bottom of the inside. For the top I do a basic fold over 1/4" twice and top stitch.  You can get creative here thou and create some very pretty hems, embroidery, added lace or ribbons. So just remember what you adding before you make your final cuts. 
Placket: Cut on fold, the width of your bag. 1/2" added to the top/bottom.
Again adjust accordingly to the size you wish for your bag.  I like the looks of  2" if the lettering/applique is large.


So for example: I want a bag to measure 8" wide & 10" tall. 
I would then cut my main piece (on the fold) 8 1/4" wide & 10 3/4 tall.
My placket would be 8" wide and 2 1/2" tall.
Make sense?
Okay let's continue...


Piece A: The main bag. Cut on fold.  
Piece B: The placket. This encases your drawstring.
Piece C: The letter/number/applique. 
Piece D: The yarn or string for the drawstring.


Step 2:
Press down your top fold.  (Fold down 1/4" press, fold again 1/4" press)
Prepare your placket by pressing under 1/4" on top and bottom. 1/2" on each end.  I like to then add some fusible interfacing, it tacks down those edges and makes sewing easier.  You can also top stitch the ends if you like.
Pin the top of the placket to the front piece. I usually do about 2" down, giving just enough of a ruffle of the main fabric at the top when the bag is drawn & tied shut.  Stitch the placket to the main bag piece along just the TOP of the placket.
 Next take the center of your string/yarn. Hold up the placket at the center, tucking the center of your yarn underneath.

  Fold the placket back down over the yarn and stitch.  This holds your yarn in place and the drawstring won't be able to be "yanked" out of the bag!

 Next pin down the bottom of the placket, being sure to tuck the yarn out of the way!  Stitch in place.

 Step 3: Add the applique to the front.  Follow the directions of the fusible webbing you use.

 Step 4: Sew the side of the main bag together. I like to do a french seam here. This makes the side seam pretty with no loose edges/serged seams showing.  To do this: Turn bag so that the right sides are out/wrong sides together. Sew a 1/4" seam. Trim close.  Turn inside out/right sides together. Sew a 1/4" seam, enclosing the previously sewn seam.


 Step 5: Sew the bottom seam.  Turn inside out/right sides together. Sew along the bottom of the bag, being sure to back-stitch and sew at least twcie to "reinforce".  You can also serge or zig-zag this seam. Trim edges. Turn back back right-side out.


 Step 6:  Turn right side out and press. Knot and trim the ends of your yarn.
(If you are worried about this, tie it first then trim according to the length you wish)

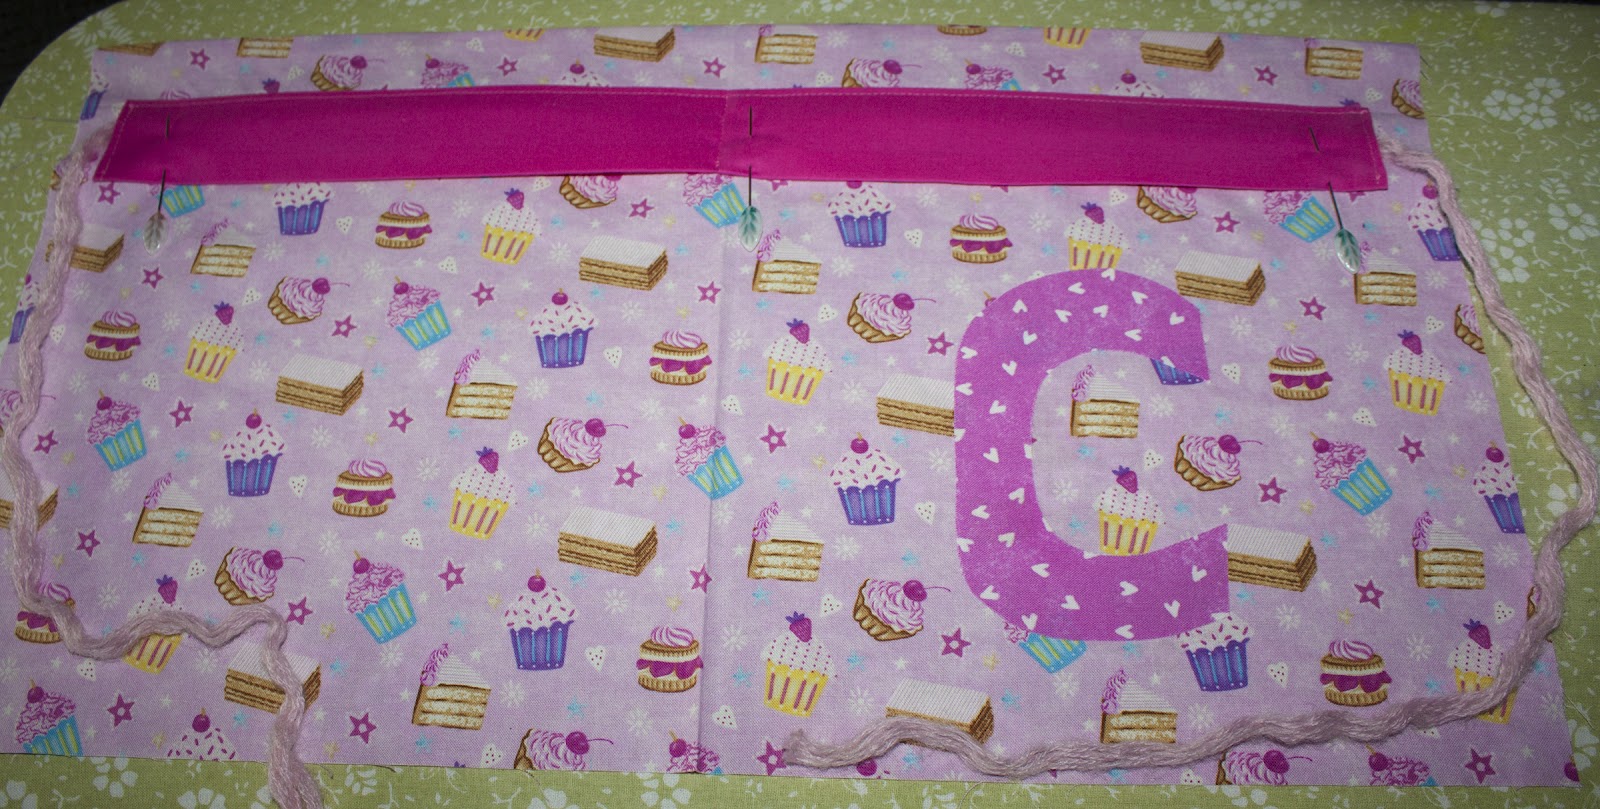
 C is for...cupcakes!


 And tied closed!  
Awww. See, so many possiblities in making your own drawstring bags!

Thank you for using my tutorial! I hope that it was a help to you in creating your own drawstring bags.  


I will post a followup to this tutorial tomorrow with various additions such as handles, lining etc.


Tuesday, August 21, 2012

Cell Pocket Tutorial for an outdoor chair

This is my Cell Pocket Tutorial for an outdoor chair. 
If you have any questions, please don't hesitate to ask!  
I created this tutorial for a HTC OneX, 
you can adjust the size for your cell, a e-reader, or iPad.  
These make incredible gifts!  
The extra pocket is great for ear-buds etc. 


 I have posted this tutorial for FREE.  
You may repost, share, etc...
but DO NOT charge for my tutorial/pattern. 

Step 1:  Cut out your pieces.  

(As I stated, these pieces I cut are to fit my cell. Adjust the size for what device you wish to create the pocket for.  Adding 1/4" or so to each side for the seams.)
Back Piece: 5 1/2" wide & 7 3/4" tall
Front Piece: 5 1/2" wide & 7 3/4" tall
Front Pockets: Inner Pocket 5 1/2" wide & 10 1/2" tall
Front Pocket 5 1/2" wide & 9 1/2" tall 
(For the frontmost pocket  I leave this piece a bit longer and wait to trim the end off as I lay it on top of the inner pocket. That way I can adjust it to be as tall as I wish. 
AND in the photo I have the pockets & button flaps already folded in-half.)
2 Button Flaps: 2 pieces 2" wide & 9" long 
(You will want to adjust the LENGTH of the flap pieces for your chair rail.  This is made to fit our  ÄPPLARÖ from IKEA outdoor chairs.)


Step 2: Interfacing & batting.

Add interfacing to the back piece, along with a piece of batting.  I sew a few lines across (I call it quick-quilting) to keep the batting held in place. You won't see this, as it will be against the chair.
Fold the two pocket pieces in half, adding interfacing inside each piece. 
Add interfacing to the button flap pieces. Then fold in half, sew down the two sides, leaving the end open to turn. Turn right-side out and press.  
I use my Great-Aunts paper press to "poke" the corners out.  This is best tool I've ever had & keep it always beside my machine. 


Step 3: Pockets

Top stitch along the top fold of the pocket pieces.  Place the inner pocket on top of the front piece and stitch along the sides and the bottom.  Place the front pocket on top, adjusting for the size of inner pocket "peeking" out as you would like, trim the extra fabric from the BOTTOM (not the top fold that you have top stitched.)  Now sew to the front piece, sandwiching your inner pocket.


Step 4:  Button Flaps
Top stitch around the edges of the  button flaps if you wish.  
On one of the flaps add your buttonhole, and on the other flap your button.  
Connect together as shown.


Step 5:  Sew pieces together

Sew the button flap to the top of the front piece at the center.  
Make sure that the button is thru the button hole flap (connected) and is facing DOWN towards the front piece. (SO technically you are sewing the buttonhole end of the flap to the top piece)
Stitch along the top (I stitch a few times to reinforce it).


Next add the back piece on top with right-sides together, stitching along the top. 
When you "open" the top piece you will have this...


 Now fold it so that the wrong sides are together and the button flap is straight out.  Press.


Step 6: Finishing the button flap

Now we are going to attach the other end of the button flap to the back piece.
Fold it down like pictured, making note of where it lays to give you enough tension/size for your chair rail.
PLEASE NOTE: when sewing to the back piece, pull the pieces back out, so that you won't be sewing thru to the front piece as well! 
I sew a rectangle with a X in the middle. Just something a bit more than a single stitch line to reinforce it.

When finished, viewed from the backside.


Step 7: Sewing Front to Back

Now fold back so that the back piece is on top of the front piece. 
The pockets and button flap sandwiched inside, with right sides together!  
Sew around the edges, leaving an opening at the bottom for turning. 
Clip corners & trim edges if needed.


Step 8: Finishing Up

Next, turn it right side out.  I reach in and pull gently on the button flap, pulling it thru the opening and then turning right side out.  Gently poke the corners out.  Press the front and back. 
Now I like to slide in a piece of cardboard covered inside batting for extra support. (I cut the cardboard approx. 5" wide & 7" tall). You can skip this step if you'd like, as the interfacing will still give it a bit of stability.
Press the bottom, folding in a bit along the opening you left for the bottom seam.
Then  top stitch along the bottom, catching the seam you just pressed in.

Viola! There you have it, a cell pocket for your outdoor chair!


Please let me know what you create using my tutorial!  
Tag me on flickr, or comment below!


Our outdoor chairs are ÄPPLARÖ from IKEA. We LOVE LOVE LOVE them!  
And yes, I made the pillows myself!